Getting started
diffpy.apps provides user applications to help with tasks using
diffpy packages. This page contains the instructions for all applications
available, including:
Use runmacro to start refinement with a macro file
The runmacro application allows users to execute macros written in the
diffpy macro language.
diffpy-app runmacro <macro_file.dp-in>
To follow the example,
download the example files from
hereextract the downloaded files and navigate to the extracted directory
mv /path/to/runmacro runmacro_example.zip working_directory
cd working_directory
unzip runmacro_example.zip
run the macro using the
runmacroapplication
diffpy-app runmacro example_macro.dp-in
How to write macro
Let’s still use the Ni example created earlier, but this time we will write the macro file from scratch.
Prepare the structure and profile file you want to work with.
Note
The structure file is a .cif file representing the atomic arrangement in
your sample, and the profile file is a .gr file containing the
experimental data.
Start the macro file with the following two lines:
load structure G1 from "path/to/structure.cif"
load profile exp_ni from "path/to/profile.gr"
G1 and exp_ni are the identifiers used in the macro to refer to the
structure and profile files, respectively. Quotes "" are must to specify
the file paths.
(Optional) Declare the space group of the structure.
set G1 spacegroup as Fm-3m
G1 is the identifier for the structure file loaded earlier. Space group
symmetry Fm-3m is preserved during the refinement. You can also set
it to be auto to use the one automatically parsed from the structure file.
But if space group is not provided, nor can it be determined from the structure
file, it will be considered as P1 space group.
(Optional) Set the calculation parameters for the refinement.
set exp_ni calculation_range as 0.5 20.0 0.01  # r_min, r_max, r_step
set exp_ni q_range as 0.5 20.0  # q_min, q_max
exp_ni is the identifier for the profile file loaded earlier.
calculation_range specifies the range and step size for the calculation,
while q_range specifies the range of Q values to be used in the refinement.
If calculation parameters are not set, it will use the ones
that are defined in the profile file.
Create the refinement equation.
create equation variables s0
set equation as "G1*s0"
G1 is the identifier for the structure file loaded earlier. In the
equation, it represents the PDF data generated from the structure G1.
s0 is created to count for the scaling factor.
Store the results.
save to "output_results.json"
The results of the refinement will be saved to a file
named output_results.json.
List variables to be refined.
variables:
---
- G1.a: 3.52
- s0: 0.4
- G1.Uiso_0: 0.005
- G1.delta2: 2
- qdamp: 0.04
- qbroad: 0.02
---
Only variables listed in this section will be refined during the execution of the macro, and the variables will also be refined in that order. Variables with initial values specified here will be used as the starting point for the refinement.
Note
The naming of variables follows the format
structure_identifier.parameter,
profile_parameter, or
equation_parameter.
For parameters belonging to a specific atom in the parameter,
the naming follows the format structure_identifier.parameter_atomindex.
e.g. G1.Uiso_0 here refers to the Uiso parameter of the first atom in
the structure G1.
For constrained parameters, it will use the first parameter in the
constraint. e.g. Here, lattice parameter a=b=c,
and Usio_0=Uiso_i, i=1,2,3, a and Uiso_0 are used as the
reference variables.
Use agentify to deploy agent skills diffpy.cmi
The agentify application allows users to deploy agentic skills in the
local environment. To use this application, run:
diffpy-app agentify
claude and codex agent skills are supported, and claude is used
by default. To specify the agent skill, use the --agent option:
diffpy-app agentify --agent codex
To deploy the agentic skill to the system directory, use the --system flag:
diffpy-app agentify --system
To update the existing diffpy.cmi agentic skill, use the --update flag:
diffpy-app agentify --update
How to use the local DiffPy MCP server
An MCP server is a bundle of tools, skills, and prompts. To use the the MCP
server, users need to connect it to a LLM based-agent,
such as Claude Desktop, and the agent will decide when and how to
interact with the MCP server in the conversation with users.
Connect to Claude Desktop
Install
Claude Desktop(hereafter referred to asClaude).Open
Claudeand open “Settings”.Navigate to the “Developer” section.
In the “Local MCP servers” region, click “Edit Config”.
Add the following configuration:
"mcpServers": {
   "diffpy.apps": {
     "command": "<path/to/python>",
     "args": [
       "-m", "diffpy.apps.refinebase.refinement_server"
     ]
   }
 }
Note
The expected <path/to/python> depends on the environment where
diffpy.apps is installed.
e.g. For conda environments, <path/to/python> can be found by
conda activate diffpy_apps_env
which python
Restart the
Claude.
6. Go to the “Local MCP servers” section and verify that the
diffpy.apps server is listed and active.
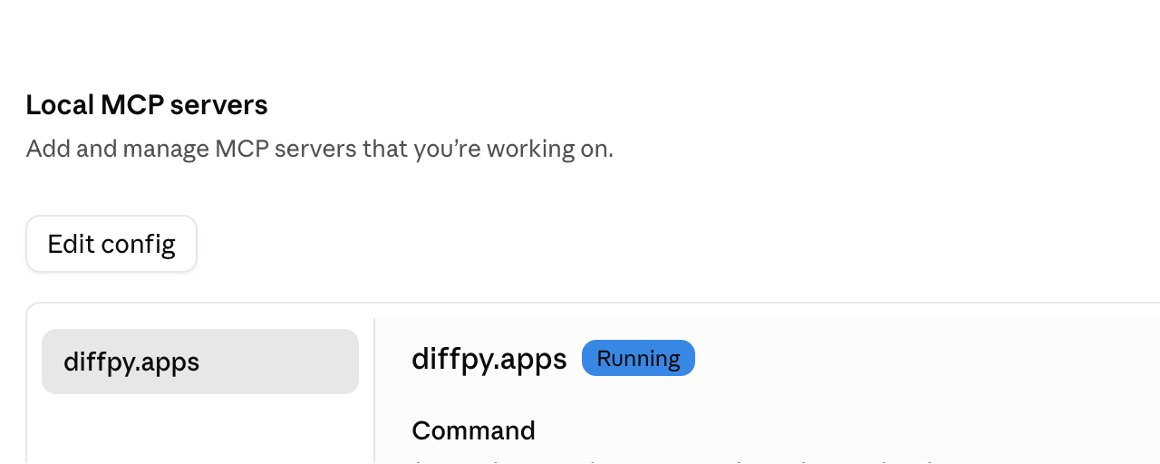
Figure 1: Screenshot of active diffpy.apps server in Claude.
Connect to ChatGPT Desktop
Install
ChatGPT Desktop(hereafter referred to asChatGPT).Open
~/.codex/config.toml.Add the following configuration:
[mcp_servers.diffpy_apps]
command =  "<path/to/python>"
args = ["-m", "diffpy.apps.refinebase.refinement_server"]
Please see the section above on how to determine the correct
<path/to/python> for your environment.
Restart the
ChatGPT.
5. Open “Settings”, and navigate to the “Integration” section. Open
“Plugins” tab, and verify that the diffpy.apps server is listed in the
“MCPs” field and active.
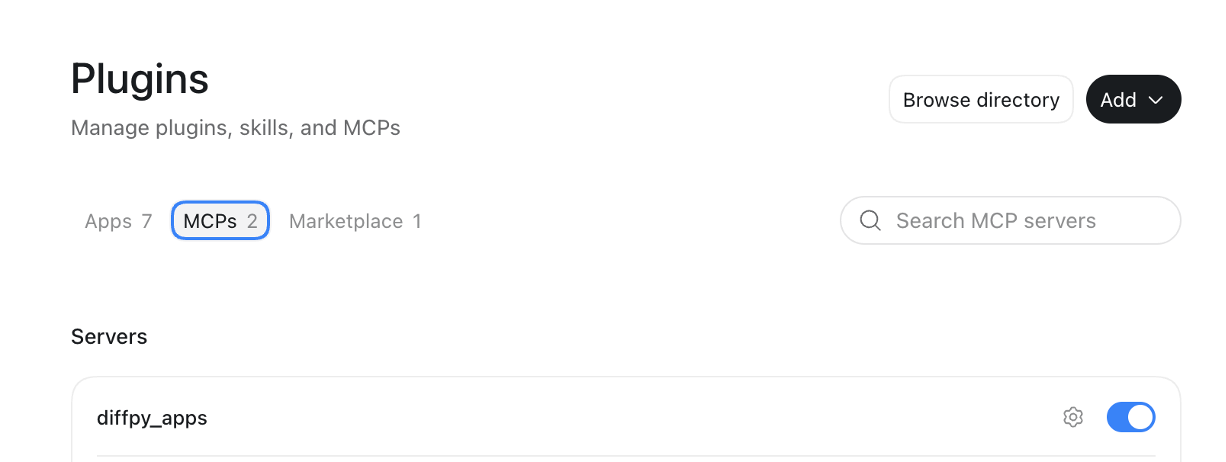
Figure 2: Screenshot of active diffpy.apps server in ChatGPT.
How to use the MCP server
Once you have updated the configuration files successfully, agent like
Claude or ChatGPT will connect to the local DiffPy MCP server
automatically whenever you open it.
Here is a simple example of conducting Ni structure refinement.
1. Download the Ni.gr and Ni.cif
files to your working directory.
2. Open Claude, launch the “Code” tab or select “Cowork” in “Chat or Cowork”
tab.
Add the working directory folder to the
Claude.
4. Start your conversation! For example, try to ask “Tell me what can diffpy.apps do and how it can help me refine the Ni.cif against the Ni.gr.”